前言
最近想要搭建自己的静态博客,去网上搜了一下,直接就选择了搜到的第一个——pelican
我把网站项目托管到了Azure,需要代码的朋友可以在公众号后台留言
环境搭建
pelican的环境搭建相当简单,首先我们安装管理python包和python虚拟环境的工具pipenv(推荐使用python3进行安装)
python3 -m pip install --user pipenv
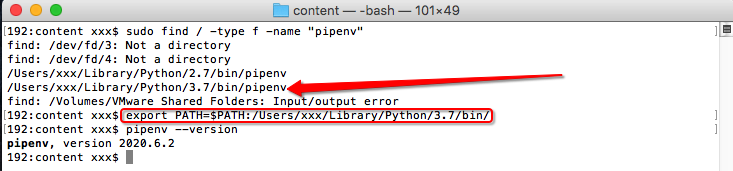
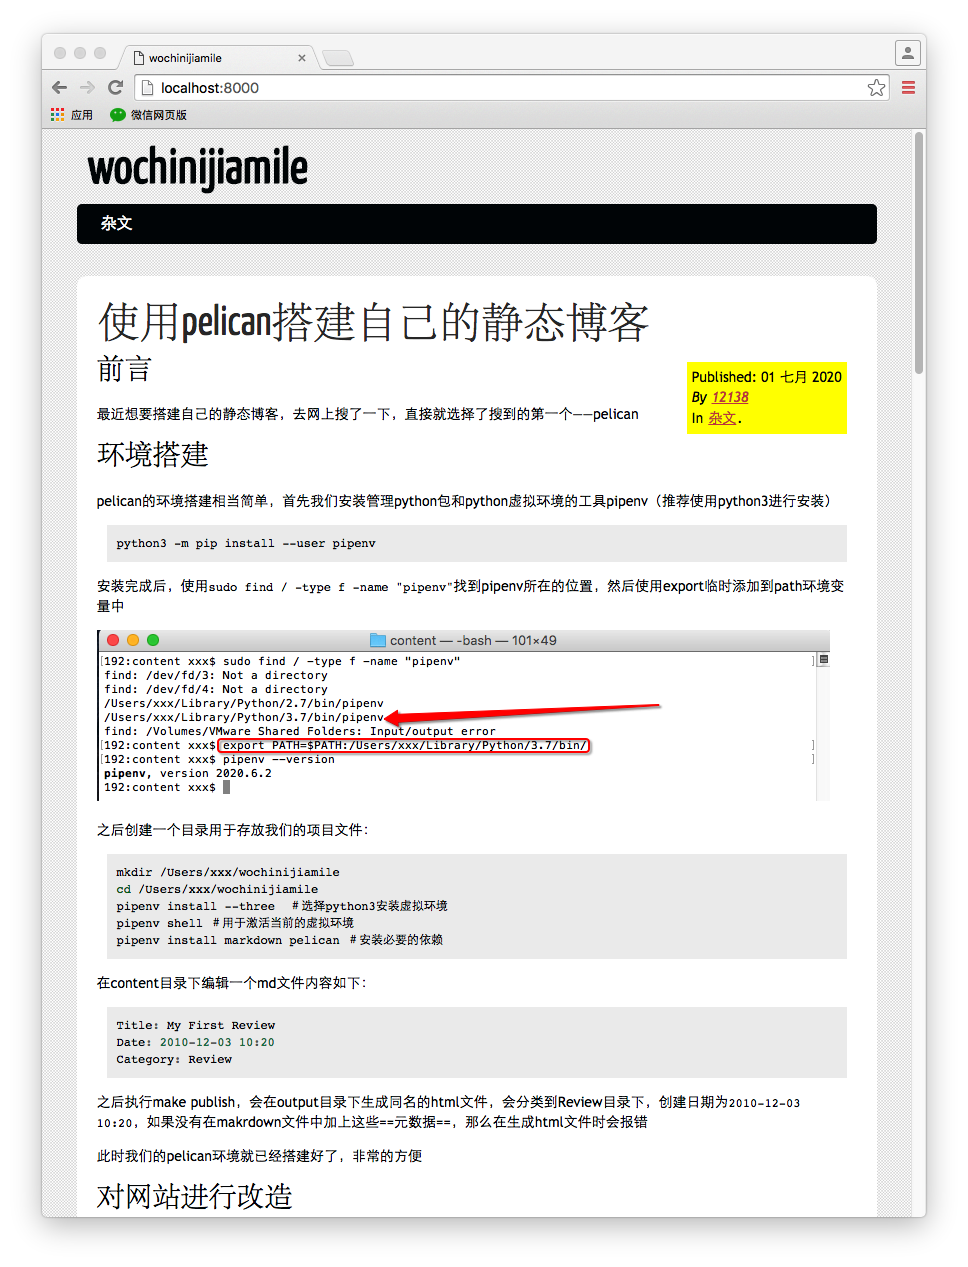
安装完成后,使用sudo find / -type f -name "pipenv"找到pipenv所在的位置,然后使用export临时添加到path环境变量中
之后创建一个目录用于存放我们的项目文件:
mkdir /home/x/wochinijiamile
cd /home/x/wochinijiamile
pipenv install --three  #选择python3安装虚拟环境
pipenv shell #用于激活当前的虚拟环境
pipenv install markdown pelican #安装必要的依赖
pelican-quickstart #初始化环境
在content目录下编辑一个md文件内容如下:
Title: My First Review
Date: 2010-12-03 10:20
Category: Review
之后执行make publish,会在output目录下生成同名的html文件,会分类到Review目录下,创建日期为2010-12-03 10:20,如果没有在makrdown文件中加上这些元数据,那么在生成html文件时会报错
此时我们的pelican环境就已经搭建好了,非常的方便
对网站进行改造
添加统计脚本并更换背景
因为觉着改pelican和jinja的源代码太麻烦,就直接写了一个render.py对生成的html文件进行处理
实现的方式就是把footer部分替换成我们自己的
因为是多行字符串的替换,所以直接替换的话会比较麻烦,我实现的方式就是先将html文件处理成单行的
fin = open(dir, "rt")
lines = fin.readlines()
data = 'biaojizifuchuangiuqerygisdgfjks'.join([line.replace('\n', '') for line in lines])
上面的代码就是将换行替换为空,然后使用自定义的连接符进行连接,在后面的代码中将要替换的内容替换完成后,再将连接符替换为换行符,这样做的目的是防止文章中的源代码也被处理成单行的
另外,通过给所有的html文件添加样式表对网站的背景做了调整,类似于网格的效果,其实就是由一个小像素点重复出来的
添加的样式表的完整内容如下:
body {
  background: url(/theme/images/page_bg.gif) repeat left top;
}
img {
    max-width: 100%;
    max-height: 100%;
}
.post-info {
    background-color: yellow;
}
然后我们再使用replace方法进行替换即可,完整代码如下:
import os
import fileinput

def get_filelist(dir):
    newDir = dir
    if os.path.isfile(dir):
        if os.path.splitext(dir)[-1] == ".html":
            replace(dir)
    elif os.path.isdir(dir):
        for s in os.listdir(dir):
            newDir=os.path.join(dir,s)
            get_filelist(newDir)

def replace(dir):
    after = """<footer id="contentinfo" class="body">                    <address id="about" class="vcard body">                    Proudly powered by <a href="http://getpelican.com/">Pelican</a>, which takes great advantage of <a href="http://python.org">Python</a>.                    </address><!-- /#about --><p>The theme is by <a href="http://coding.smashingmagazine.com/2009/08/04/designing-a-html-5-layout-from-scratch/">Smashing Magazine</a>, thanks!<br/><script type="text/javascript">document.write(unescape("%3Cspan id='cnzz_stat_icon_1278862900'%3E%3C/span%3E%3Cscript src='https://s9.cnzz.com/z_stat.php%3Fid%3D1278862900%26show%3Dpic' type='text/javascript'%3E%3C/script%3E"));</script><script>    let item = document.getElementsByTagName("img");        for (let index = 0; index < item.length; index++) {             let class_name = item[index].getAttribute("src");               if(class_name.indexOf("assets") != -1)                  item[index].setAttribute("src", "/theme/images/" + class_name)  }</script></p>            </footer><!-- /#contentinfo -->"""

    before = """<footer id="contentinfo" class="body">biaojizifuchuangiuqerygisdgfjks                <address id="about" class="vcard body">biaojizifuchuangiuqerygisdgfjks                Proudly powered by <a href="http://getpelican.com/">Pelican</a>, which takes great advantage of <a href="http://python.org">Python</a>.biaojizifuchuangiuqerygisdgfjks                </address><!-- /#about -->biaojizifuchuangiuqerygisdgfjksbiaojizifuchuangiuqerygisdgfjks                <p>The theme is by <a href="http://coding.smashingmagazine.com/2009/08/04/designing-a-html-5-layout-from-scratch/">Smashing Magazine</a>, thanks!</p>biaojizifuchuangiuqerygisdgfjks        </footer><!-- /#contentinfo -->"""

    before1 = """<link rel="stylesheet" href="./theme/css/main.css" />"""
    after1  = """<link rel="stylesheet" href="./theme/css/main.css" /><link rel="stylesheet" href="/theme/css/1.css" />"""
    #read input file
    print(dir)
    fin = open(dir, "rt")
    #read file contents to string
    lines = fin.readlines()
    data = 'biaojizifuchuangiuqerygisdgfjks'.join([line.replace('\n', '') for line in lines])

    #replace all occurrences of the required string
    data = data.replace(before, after)
    data = data.replace(before1, after1)
    data = data.replace('biaojizifuchuangiuqerygisdgfjks', '\n')
    #close the input file
    fin.close()
    #open the input file in write mode
    fin = open(dir, "wt")
    #overrite the input file with the resulting data
    fin.write(data)
    #close the file
    fin.close()

if __name__ =="__main__":
    get_filelist("/var/www/html")
解决图片路径问题
因为我本地使用的是typora进行文章的编写,所以文章中的图片都是存储在当前目录下的以文件名.assets命名的文件夹中,pelican在生成的html文件的图片路径也是文件名.assets/xxx.png,这样的问题是在一些页面中会显示不出来,因此可以将其改成绝对路径以解决此问题
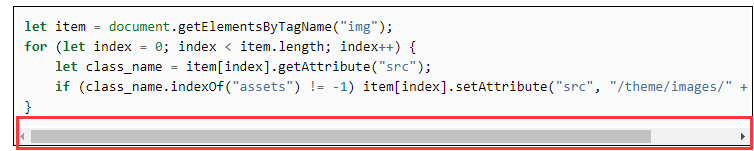
首先将content目录下的所有包含assets字符串的目录复制到输出目录/var/www/html/theme/images中,然后使用上面加入网站统计脚本的时候加入的另一个js脚本对当前dom树中的所有img节点进行处理,代码如下:
let item = document.getElementsByTagName("img");
for (let index = 0; index < item.length; index++) {
    let class_name = item[index].getAttribute("src");
    if (class_name.indexOf("assets") != -1) item[index].setAttribute("src", "/theme/images/" + class_name)
}
生成目录
其实要想生成目录,还是挺简单的,只需要添加一个js脚本即可
<script>
    var toc = "";
    var level = 0;
    obj = document.getElementById("featured");
    if (obj == null) {
        document.getElementById("content").innerHTML = document.getElementById("content").innerHTML.replace(/<h([\d])>([^<]+)<\/h([\d])>/gi, function(str, openLevel, titleText, closeLevel) {
            if (openLevel != closeLevel) {
                return str;
            }
            if (openLevel > level) {
                toc += (new Array(openLevel - level + 1)).join("<ul>");
            } else if (openLevel < level) {
                toc += (new Array(level - openLevel + 1)).join("</ul>");
            }
            level = parseInt(openLevel);
            var anchor = titleText.replace(/ /g, "_");
            toc += `<li><a href="#` + anchor + `">` + titleText + "</a></li>";
            return `<h` + openLevel + ` class="wusoifghbsudfgbuslfhnsdl"><a name="` + anchor + `">` + titleText + "</a></h" + closeLevel + ">";
        });
        if (level) {
            toc += (new Array(level + 1)).join("</ul>");
        }
        document.getElementById("toc").innerHTML += toc;
    }
</script>
这里有个地方需要注意,那就是如果在一个分类里面有两篇以上的文章,那么pelican默认会对第二篇及以后的文章进行一个简化,类似于如下的形式:
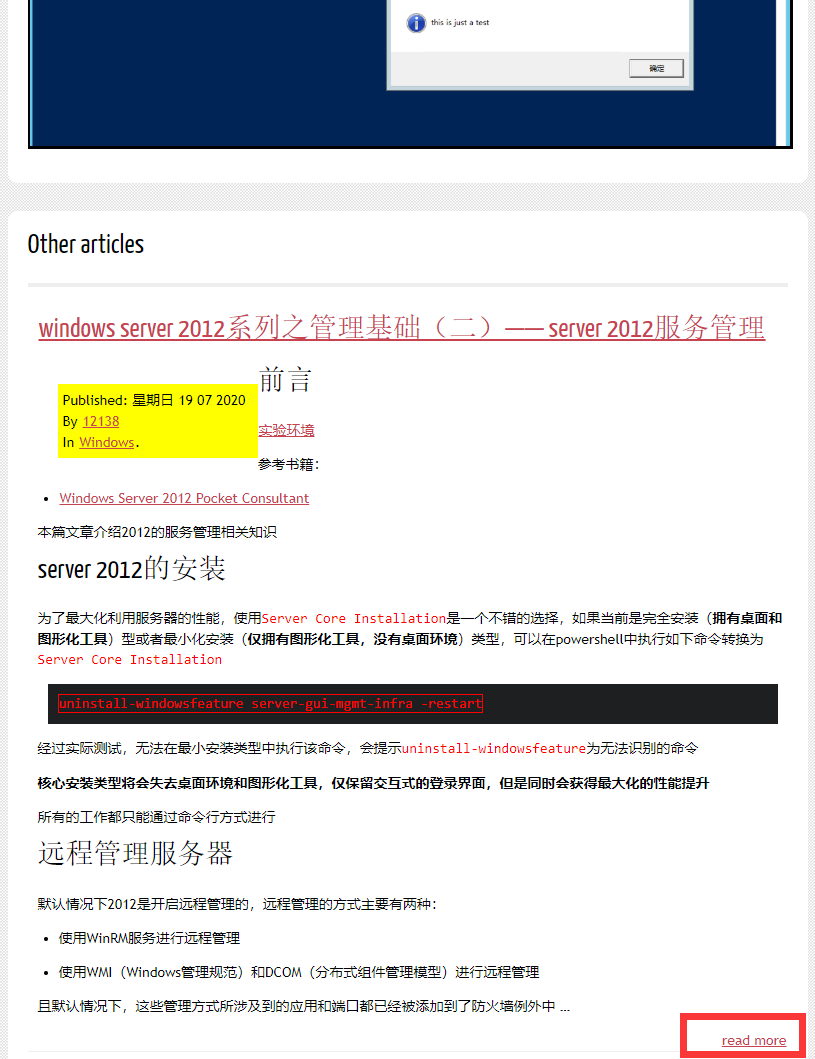
第一篇文章是整个都会展示出来,但是后面的文章只会展示一部分,因此我们只需要为第一篇文章生成目录,这个时候就有一个问题,第一篇文章在专栏页面和正文页面都是完全显示的,因此在这两个地方都要生成目录,在专栏页面正文存在于<aside id="featured" class="body">,在正文页面文章存在于<section id="content" class="body">,因此需要进行判断,如果存在featured这个ID,就要从featured中去取出文章正文进行标题的提取和目录生成,如果不存在,则从content这个ID中处理,这样可以避免,在专栏页面出现后几篇文章的目录也合并到第一篇的目录中的问题,具体代码可以参考网站html源码
根据实际情况对代码进行改进
在后来的使用过程中,发现<a name="中文">会出现锚点无法定位的问题,遂将目录生成代码作如下更改:
var toc = "";
var level = 0;
document.getElementById("featured").innerHTML = document.getElementById("featured").innerHTML.replace(/<h([\d])>([^<]+)<\/h([\d])>/gi,
function(str, openLevel, titleText, closeLevel) {
    if (openLevel != closeLevel) {
        return str;
    }
    if (openLevel > level) {
        toc += (new Array(openLevel - level + 1)).join("<ul>");
    } else if (openLevel < level) {
        toc += (new Array(level - openLevel + 1)).join("</ul>");
    }
    level = parseInt(openLevel);
    var anchor = titleText.replace(/ /g, "_");
    //替换掉中文的左右括号
    anchor = anchor.replace("(", "_");
    anchor = anchor.replace(")", "_");
    anchor = pinyin.getFullChars(anchor);
    toc += ` < li > <a href = "#qqq` + anchor + `" > ` + titleText + "</a></li>";
    return` < h` + openLevel + `class = "wusoifghbsudfgbuslfhnsdl" > <a id = "qqq` + anchor + `" > ` + titleText + "</a></h" + closeLevel + ">";
});
if (level) {
    toc += (new Array(level + 1)).join("</ul>");
}
document.getElementById("toc").innerHTML += toc;
这里我是去网上找了一个汉字转拼音的js脚本,将每个小标题的内容转换成对应的拼音作为锚点,脚本位置
增加评论功能
使用开源的gitalk为网站增加评论功能,首先在<head></head>中引入js脚本:
<link rel="stylesheet" href="https://cdn.jsdelivr.net/npm/gitalk@1/dist/gitalk.css">
<script src="https://cdn.jsdelivr.net/npm/gitalk@1/dist/gitalk.min.js">
然后在网页中添加如下js代码:
var gitalk = new Gitalk({
    clientID: 'ff9b5af164834eeaab76',
    clientSecret: '036a95b190dbc132a44d26990b69c2a266b599bf',
    repo: 'gitalk',
    owner: 'wqreytuk',
    admin: ['wqreytuk'],
    number: 1,
    id: location.href,
    distractionFreeMode: false
});
gitalk.render('gitalk-container')
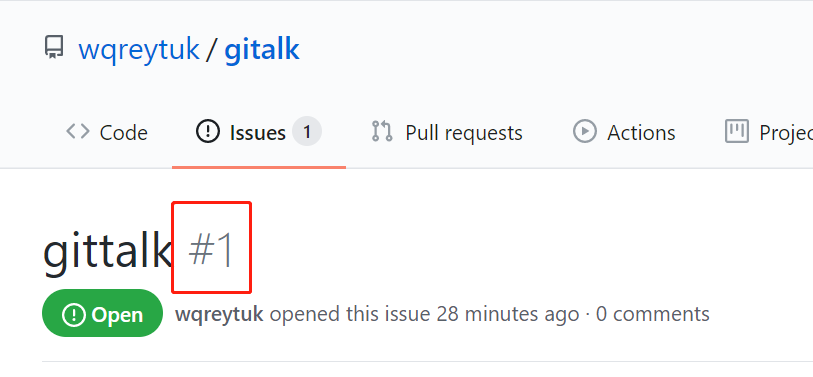
其中clientID和clientSecret在注册完GitHub Application后即可获得,repo是我们专门创建的用于开设issue的仓库,owner和admin直接填自己的github用户名就行了,number就是我们开的issue的编号:
然后在合适的位置插入如下html代码:
<div id="gitalk-container"></div>
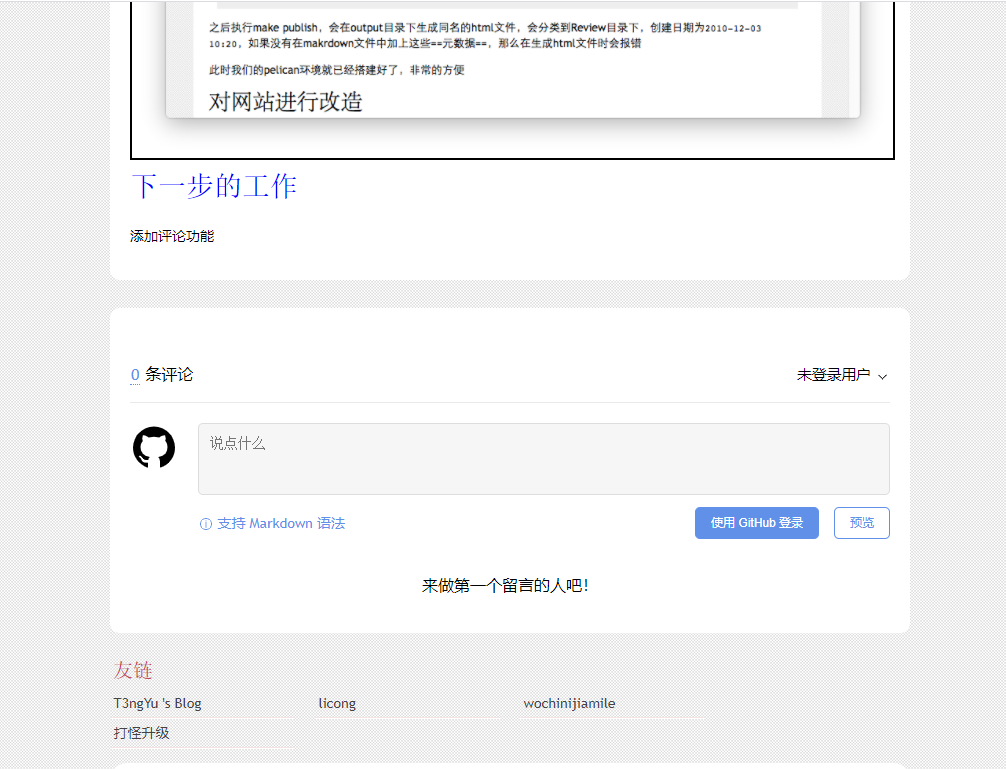
最终效果如下:
增加回到顶部按钮
在css文件中加入以下内容:
.top{
    /* width: 50px; */
    /* height: 50px; */
    background-color: #fcf8e3;
    border-radius: 50%;
    position: fixed;
    right: 100px;
    bottom: 20px;
    right: 20px;
    z-index: 1111111111;
}
img {
    border: solid 2.5px black;
    display: block;
    margin: auto;
    max-width: 100%;
    max-height: 100%;
}
.show-txt {
    display: none;
    position: absolute;
    top: 0;
    bottom: 0;
    left: 0;
    right: 0;
    border-radius: 50%;
    -webkit-box-align: center;
    -ms-flex-align: center;
    align-items: center;
    -webkit-box-pack: center;
    -ms-flex-pack: center;
    justify-content: center;
    font-size: 12px;
    line-height: 14px;
    color: #999aaa;
    background-color: #fff;
    text-align: center;
    opacity: 0;
    -webkit-transition: opacity .3s ease-in-out;
    transition: opacity .3s ease-in-out;
}
a.option-box {
    position: relative;
    display: -webkit-box;
    display: -ms-flexbox;
    display: flex;
    -webkit-box-orient: vertical;
    -webkit-box-direction: normal;
    -ms-flex-direction: column;
    flex-direction: column;
    -webkit-box-align: center;
    -ms-flex-align: center;
    align-items: center;
    -webkit-box-pack: center;
    -ms-flex-pack: center;
    justify-content: center;
    border-radius: 50%;
    background: #000;
    -webkit-box-shadow: 0 2px 4px 0 rgb(0 0 0 / 5%);
    box-shadow: 0 2px 4px 0 rgb(0 0 0 / 5%);
    background-color: #fff;
    text-align: center;
    height: 44px;
    width: 44px;
    cursor: pointer;
    /* margin-top: 8px; */
    z-index: 11111111;
}
/*目的是实现在鼠标经过回到顶部按钮时从图标切换成文字的效果*/
a.option-box:hover {
    display: -webkit-box;
    /* opacity: 100; */
}
在网页中加入以下代码以实现动态滚动效果:
var myTimer = -1;
$(".option-box").click(function(){
    var scrollTo = document.documentElement.scrollTop || document.body.scrollTop;
    if(myTimer = -1){
        myTimer = setInterval(() => {
            scrollTo -= 60;
            if(scrollTo<=0){
                scrollTo = 0;
                window.clearInterval(myTimer);
                myTimer = -1;
            }
        window.scrollTo(0,scrollTo);
    }, 10);
    }
})
最后在网页中插入如下代码即可:
<html>
 <head></head>
 <body>
  <div class="top">
   <a class="option-box" data-type="gotop">
        <img src="https://g.csdnimg.cn/side-toolbar/3.0/images/fanhuidingbucopy.png" alt="" srcset="" />
        <span class="show-txt">
            返回
            <br />
            顶部
        </span>
   </a>
  </div>
 </body>
</html>
给网站加上小绿锁(https)
首先我们要搞一个证书,可以直接在阿里云免费申请
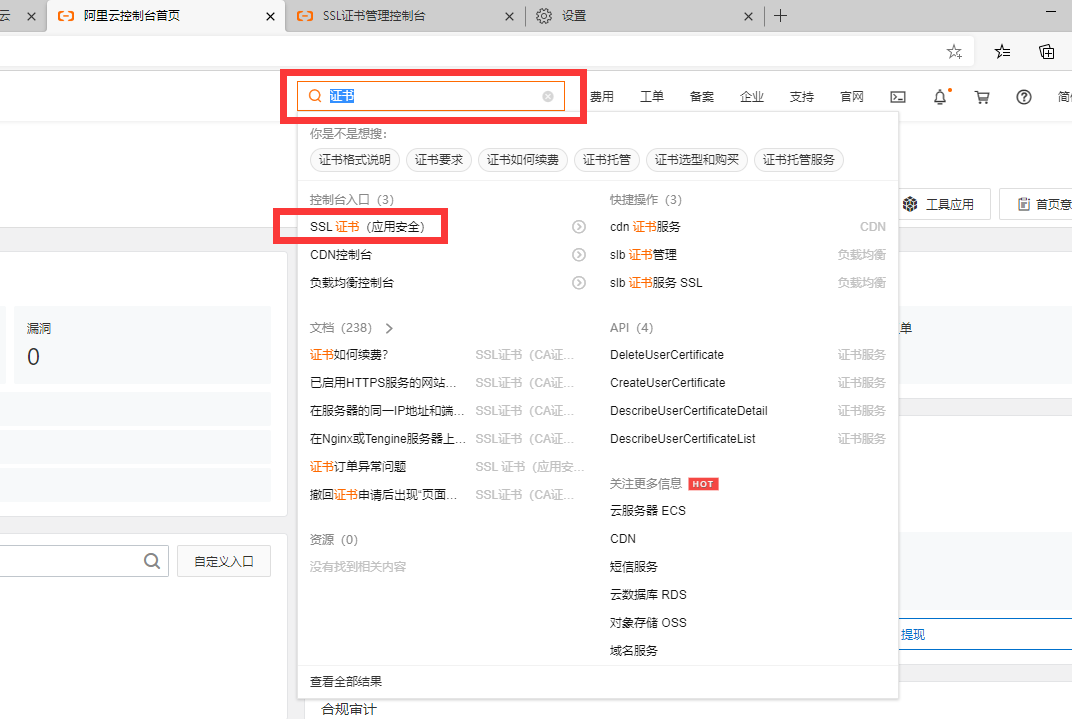
首先,访问这里登录阿里云控制台
然后直接搜索证书,然后从搜索结果中选择SSL证书(应用安全)
在这里购买免费证书即可

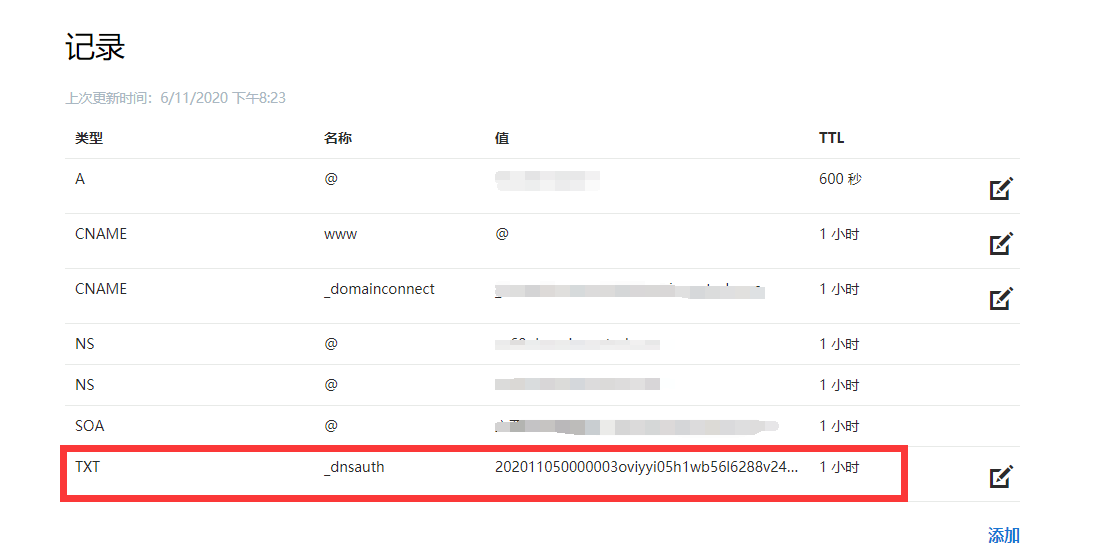
在购买之后阿里云会对你的域名所有权进行验证,验证方式就是检查你的域名有没有添加指定的txt记录:
然后我们按照提示填好所有的信息即可,我当时等待了十多分钟就申请下来了
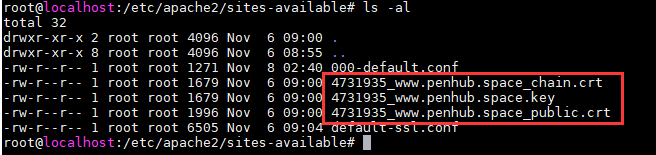
然后就是将证书文件下载下来解压放到我们的服务器上,只要不是临时目录,随便一个目录都行,下面这三个文件分别是证书链文件、私钥和证书文件,我们可以使用openssl命令自行解析证书文件:openssl x509 -in 4731935_www.yourdomain.com_public.crt -text -noout
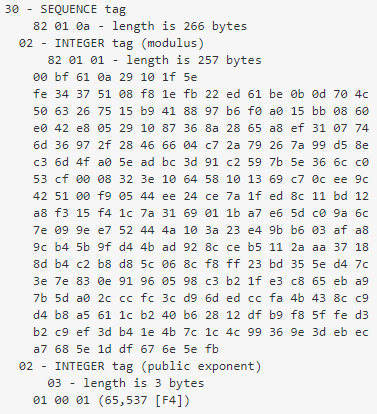
你可能会发现openssl解析出来的公钥内容和浏览器解析出来的公钥内容不太一样,开头多了一个30 82 01 0a 02 82 01 01,结尾多了一个02 03 01 00 01,参考这里可知,这两部分是两个固定字段
证书链文件用于提供给客户端进行认证机构的回溯,私钥对则用于对通信过程中所使用的对称算法密钥进行加解密,证书文件中包含了公钥信息
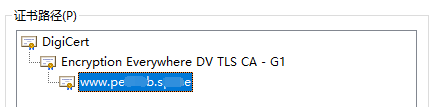
这里的证书链文件中的内容其实就是Encryption Everywhere DV TLS CA -G1的证书,因为一般情况下,浏览器只存储根证书,因此我们需要向浏览器提供次级CA机构的证书,这样浏览器就会使用该次级CA机构的公钥对我们的证书进行验证,确定我们的证书是使用该次级CA机构的私钥进行过签名的,然后再使用root CA机构的公钥验证该次级CA的证书是被root CA的私钥签名过的,至此我们的证书验证也就完成了,服务器身份确认
我这里使用的是apache2服务器,仅作参考
首先我们要启用ssl模块,直接使用a2enmod ssl即可,然后我们要在/etc/apache2/sites-enabled目录下创建一个/etc/apache2/sites-available/default-ssl.conf的软链接:a2ensite default-ssl
然后编辑/etc/apache2/sites-available/default-ssl.conf内容:
root@localhost:/etc/apache2/sites-enabled# cat 000-default-ssl.conf | grep -v "#"

<IfModule mod_ssl.c>
    <VirtualHost _default_:443>
        ServerAdmin 11111111@qq.com

        DocumentRoot /var/www/html
        ServerName yourdomain.com

        ErrorLog ${APACHE_LOG_DIR}/error.log
        CustomLog ${APACHE_LOG_DIR}/access.log combined


        SSLEngine on

        SSLCertificateFile      /etc/apache2/sites-available/4731935_www.yourdomain.com_public.crt
        SSLCertificateKeyFile   /etc/apache2/sites-available/4731935_www.yourdomain.com.key
        SSLCertificateChainFile /etc/apache2/sites-available/4731935_www.yourdomain.com_chain.crt

        <FilesMatch "\.(cgi|shtml|phtml|php)$">
            SSLOptions +StdEnvVars
        </FilesMatch>
        <Directory /usr/lib/cgi-bin>
            SSLOptions +StdEnvVars
        </Directory>
    </VirtualHost>
</IfModule>
最后一个问题就是http重定向至https,这里我没有使用apache2自带的rewrite功能,而是使用了js脚本进行替换:
var str = window.location.href;

if (str.indexOf("http://penhub.space") != -1)
{
    window.location.href = str.replace("http://penhub.space", "https://penhub.space");
}

if (str.indexOf("144.34.164.217") != -1)
{
    /*var strrrr =*/
    window.location.href = str.replace("http://144.34.164.217", "https://penhub.space");
}
rewrite模块用法请参考:https://zhuanlan.zhihu.com/p/270230904
certbot
以前的域名不用了,把阿里云的证书吊销了,想着重新申请一个,但是已经不能白嫖了,好像只有新用户可以
网上搜了一下,最后选择使用certbot自动申请Let's Encrypt的证书,用法相当简单,跟着官方指导走就行了
在这里选择你的Web服务器类型和操作系统,下方会自动生成需要你执行的命令,看不懂可以翻译一下或着在我的网站留言
这个用起来还是很方便的,全程向导,自动配置服务器,且可以自动更新将要过期的证书
freessl.cn
现在certbot我也不用了,直接用这个网站申请免费证书,然后自己配置一下就完事了
解决字体超出容器宽度的问题
在css中加入如下代码即可:
word-wrap:break-word;
word-break:break-all;
overflow: auto;
对于代码块,超出的部分不会被裁剪,而是使用水平滚动的方式进行查看,这个由overflow: auto进行控制
word-wrap:break-word和word-break:break-all可以确保被引用的部分不会超出页面宽度,而是自动换行

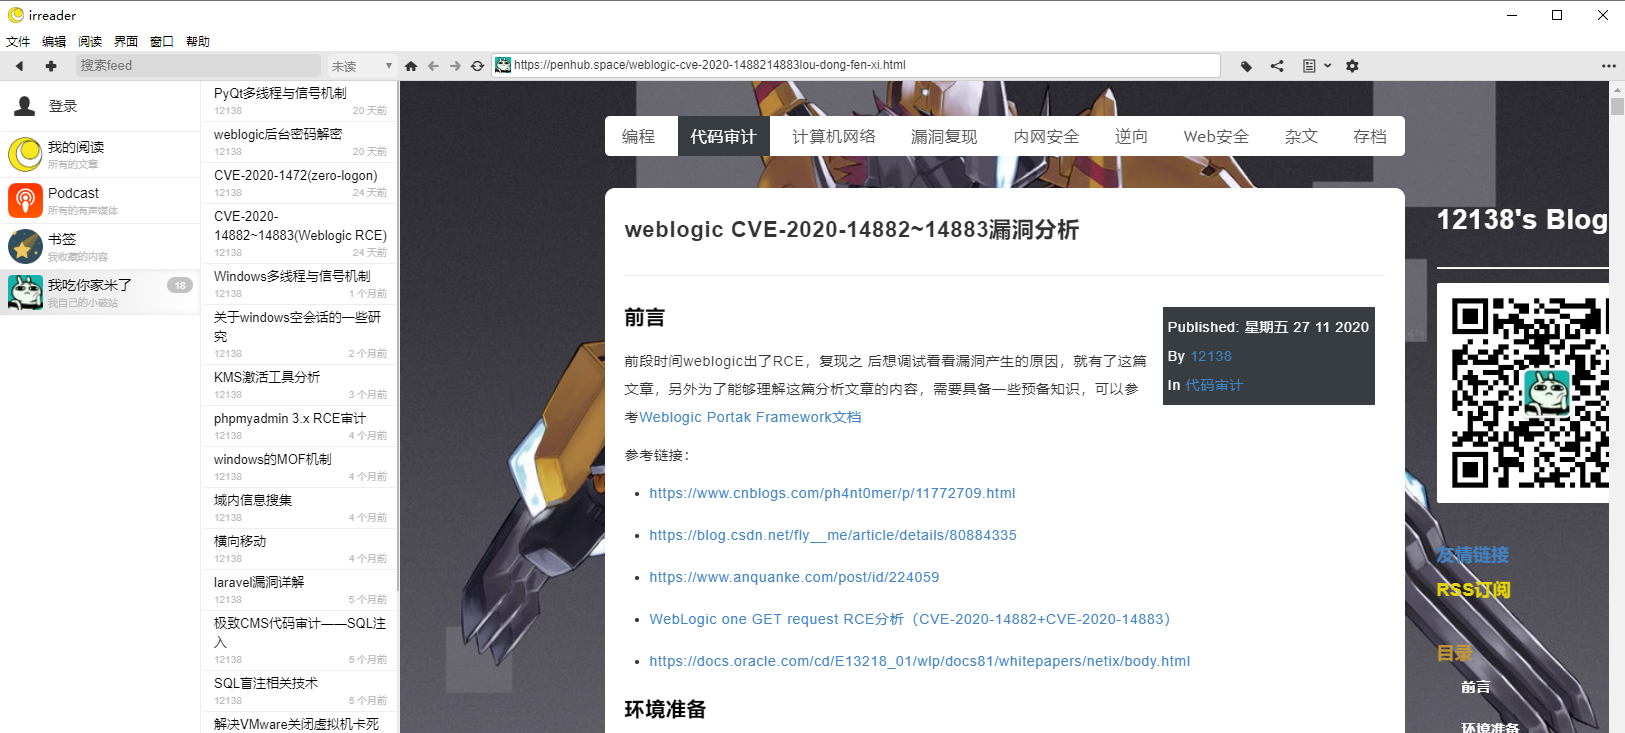
处理RSS订阅链接
pelican所生成的rss订阅的xml文件有问题,无法直接订阅,问题出在link标签的href属性,比如我们当前这篇文章的订阅链接为href="shi-yong-pelicanda-jian-zi-ji-de-jing-tai-bo-ke.html",我使用irreader进行订阅时发现其访问的链接直接就是shi-yong-pelicanda-jian-zi-ji-de-jing-tai-bo-ke.html,因此我们需要对其进行处理,加上我们网站的地址,处理代码如下:
fisssn = open('/var/www/html/feeds/all.atom.xml', "rt")
lines = fisssn.readlines()
dddddata = 'biaojizifuchsuangiuqeryguisdgfjks'.join([line.replace('\n', '') for line in lines])
#加上我们网站的地址
dddddata = dddddata.replace('<link href="', '<link href="http://144.34.164.217/')
dddddata = dddddata.replace('biaojizifuchsuangiuqeryguisdgfjks', '\n')
fisssn.close()
fisssn = open('/var/www/html/feeds/all.atom.xml', "wt")
fisssn.write(dddddata)
fisssn.close()
然后就可以正常订阅了
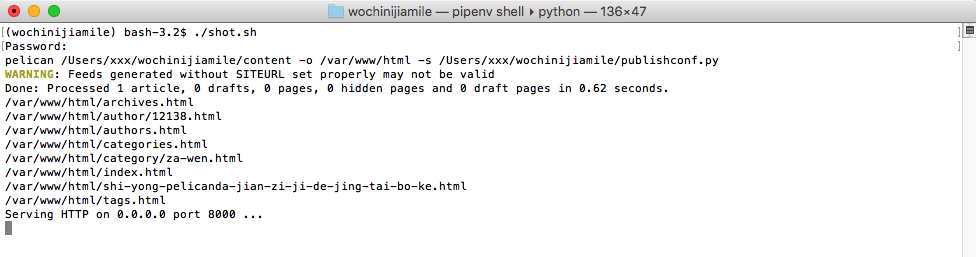
本地预览
完整的处理脚本如下:
publish.sh
#!/bin/bash
make publish
python3 /home/x/wochinijiamile/render.py
chmod -R 777 /home/x/wochinijiamile/*
cp /home/x/wochinijiamile/47yr3w8gbhisrydus.html /var/www/html
cp /home/x/wochinijiamile/favicon.ico /var/www/html
cp -r /home/x/wochinijiamile/content/*assets* /var/www/html/theme/images
cp -r /home/x/wochinijiamile/css/* /var/www/html/theme/css
cp -r /home/x/wochinijiamile/images/* /var/www/html/theme/images
. /home/x/wochinijiamile/1.sh
1.sh的内容如下
#!/bin/bash
cd /var/www/html
python -m SimpleHTTPServer
然后使用如下方式执行该脚本:
. ./shell.sh
这样执行可以将当前工作目录切换为脚本中cd的目录
使用shot.sh调用publish.sh:
shot.sh
#!/bin/bash
sudo /home/x/wochinijiamile/publish.sh
bootstrap
最后还是将网站改造成了响应式的,因为手机看起来确实太不方便
改造的方法也挺简单,使用pelican的bootstrap3主题和i18n_subsites插件即可,具体使用方法请参考:https://github.com/getpelican/pelican-themes/tree/master/pelican-bootstrap3
在改造过程中遇到的问题,就是我使用的pelican并不是最新版本,在生成网页时会出现如下报错:
CRITICAL: TypeError: not all arguments converted during string formatting
该问题可以通过更新至pelican最新版本解决,我是直接使用git克隆了pelican在github上的项目,然后使用setup.py安装的
jsdelivr+github免费CDN
当然这个不同于付费的CDN,没有网站保护功能,只是单纯地加速网站的静态资源(js、css、图片等)
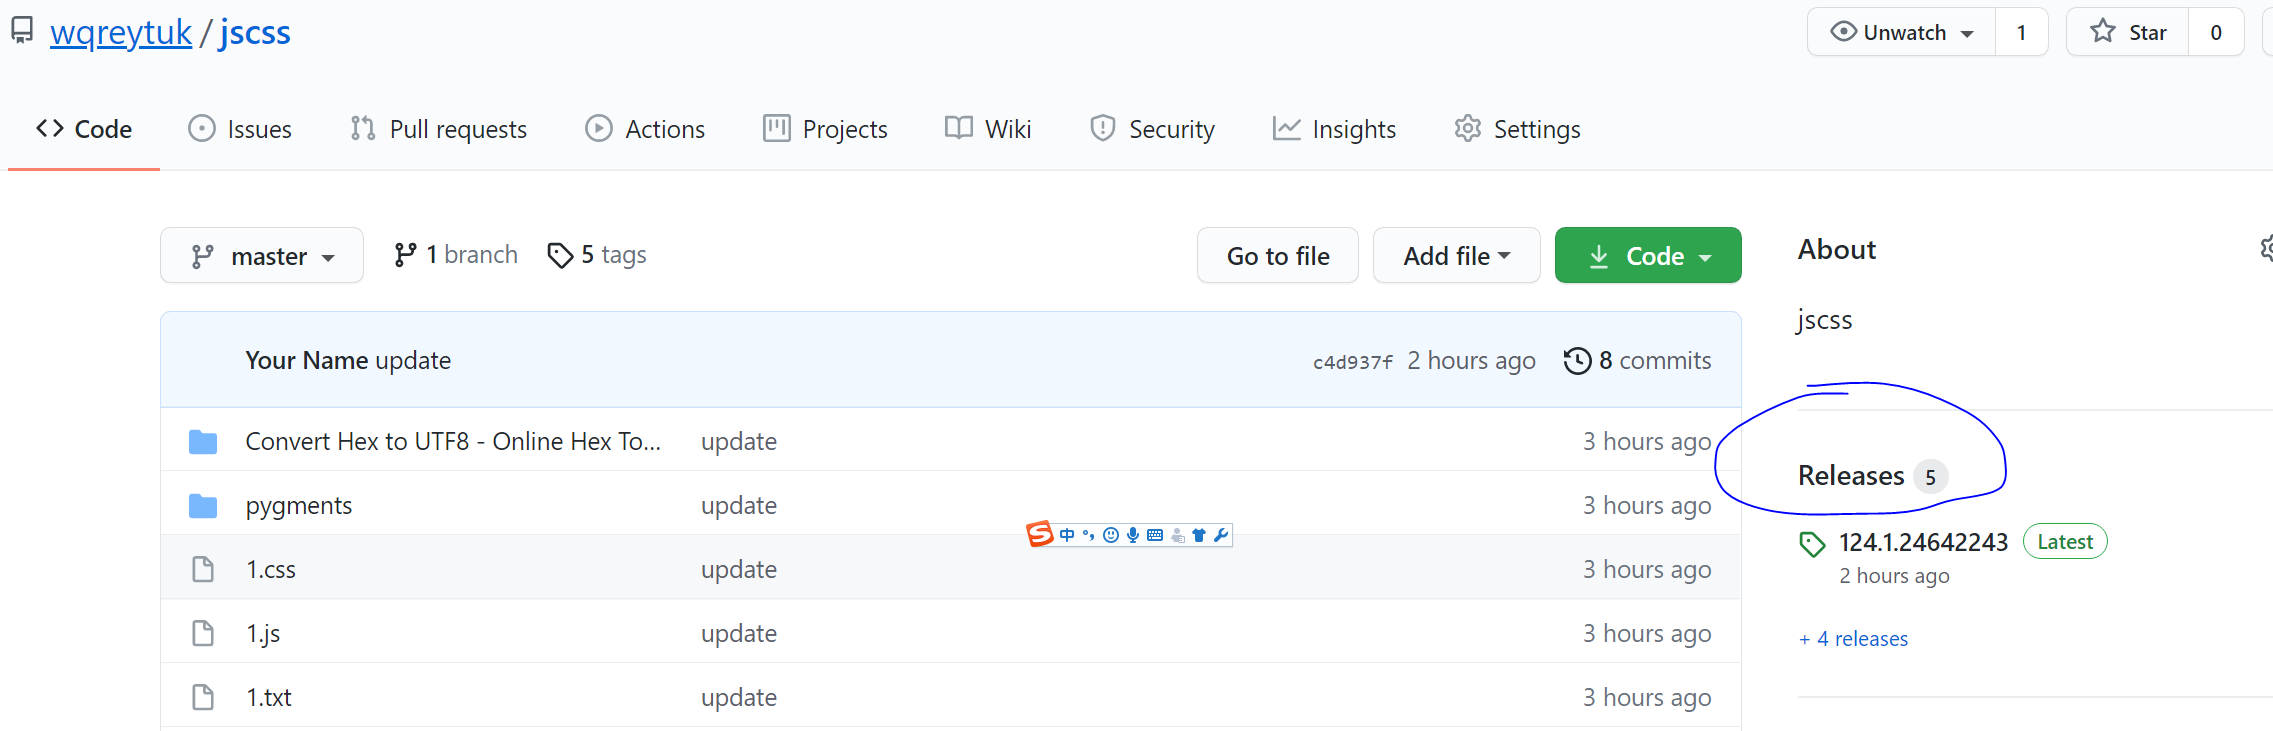
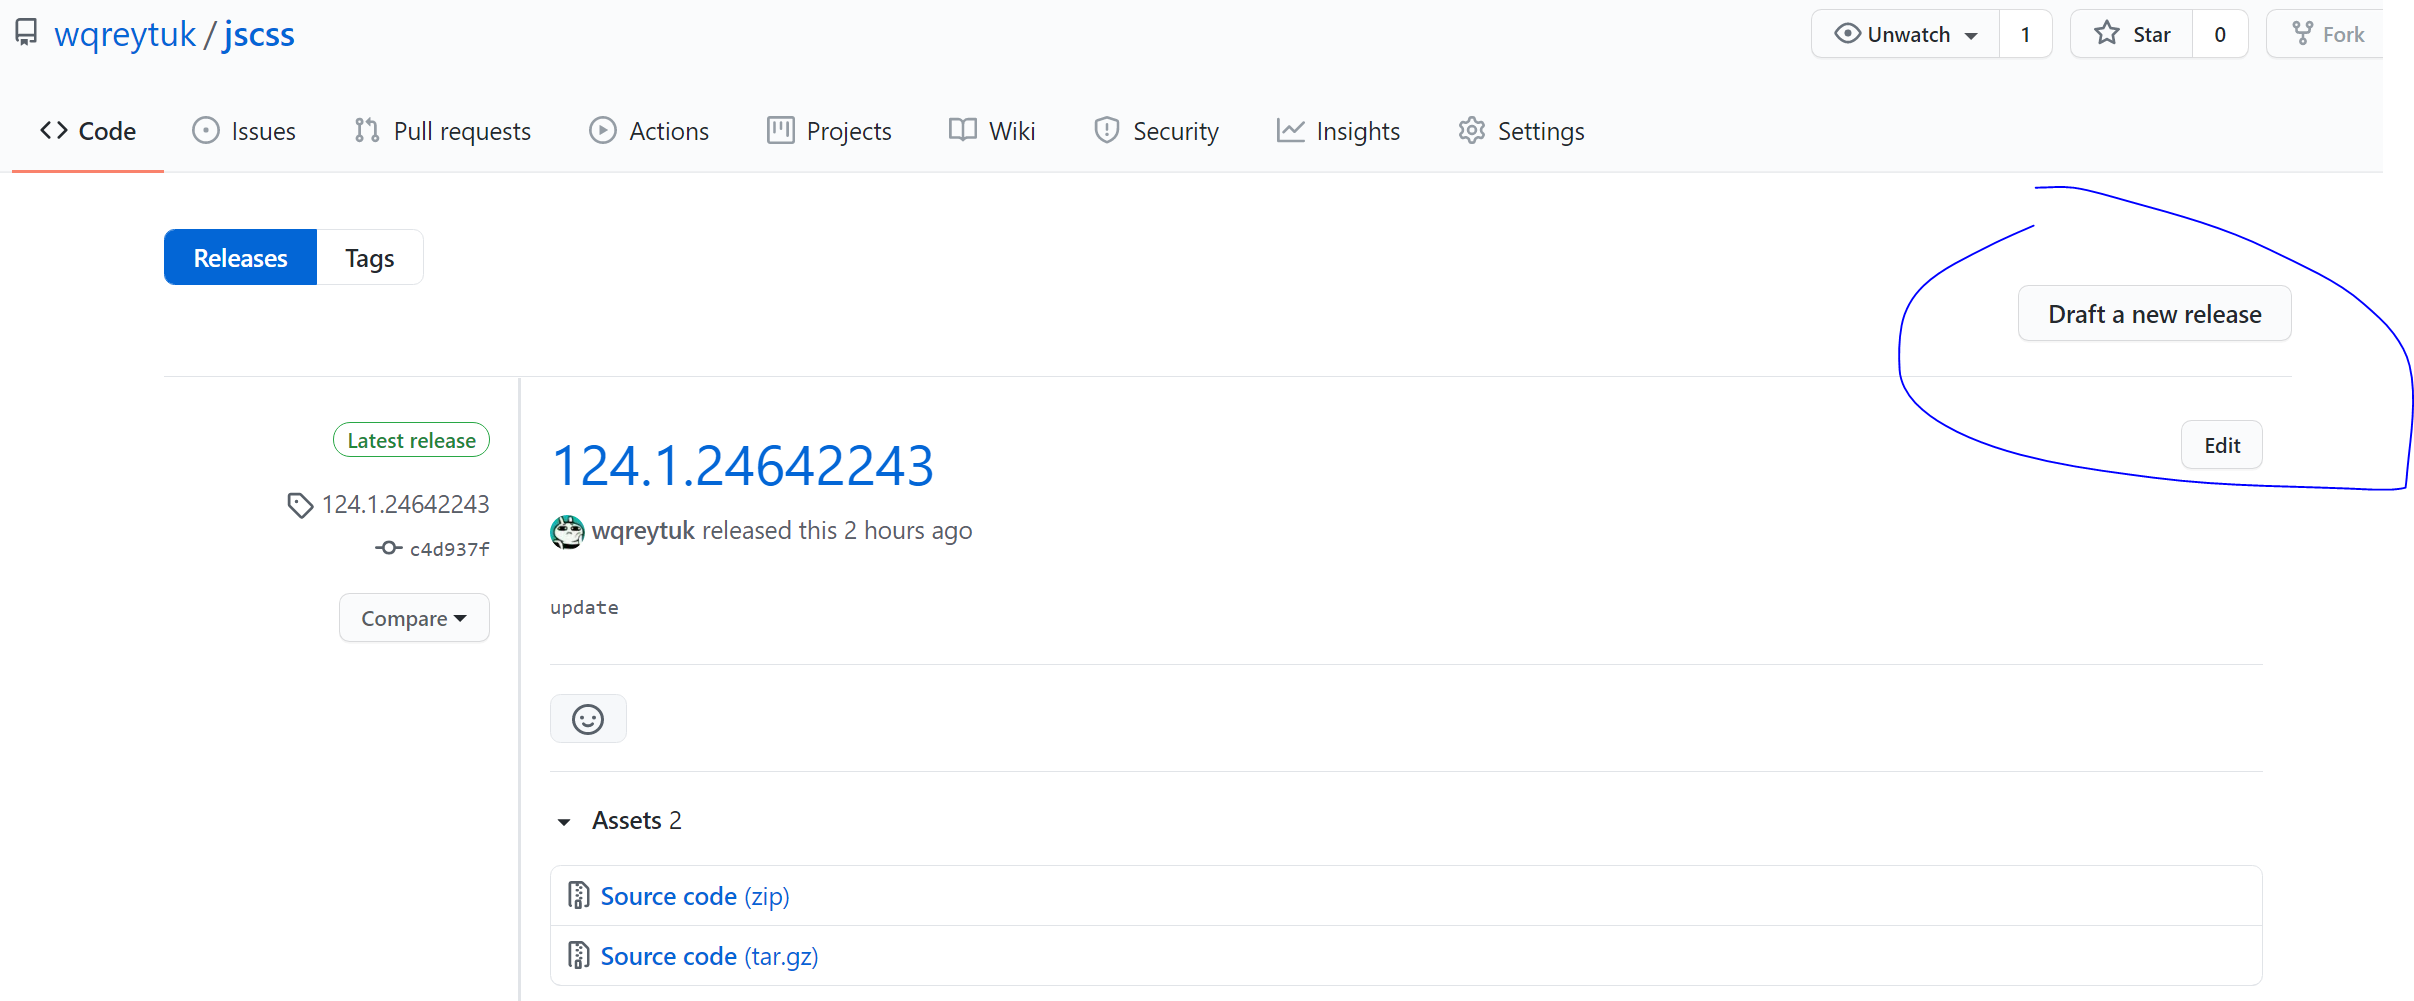
在自己的github上新建一公共仓库,把需要加速的静态资源全部push上去,然后点击右侧的release发布,版本号随便填,只要别和上次的一样就行
然后可以使用如下格式通过jsdelivr进行访问
https://cdn.jsdelivr.net/gh/wqreytuk/jscss@124.1.24642243/2.css
wqreytuk是你的github用户名
jscss是你新建的静态资源仓库名
@124.1.24642243是你发布的release的版本号,其中@是固定的
最后就是你的静态资源在仓库中的路径了,如果有目录,就照着往上写就行了
亲测可用,速度还是很快的,而且图片也能进行加速,很良心了
如果静态资源有改动,需要重新进行发布